If you browse the Internet, you’ll see articles about installing XRDP, x11VNC, etc, etc. This all sounded a bit too complicated for me, especially since Linux Mint has built-in desktop sharing capabilities. Warning: It’s worth noting that the method I’m describing below disables encryption for the remote connection. For me, this is a non-issue since I am simply connecting to the Linux box from within my local network. If you need to have encryption enabled for the remote connection, I’ll be writing up another post soon on how to do that as it’s a bit more complicated.
Configure Desktop Sharing Settings
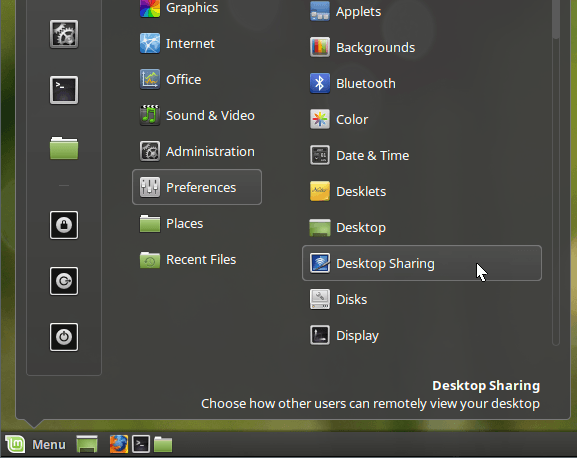
In Linux Mint, click on the menu button, Preferences and then Desktop Sharing. This will open the Desktop Sharing Preferences screen where you can enable other users to connect to the Linux system.
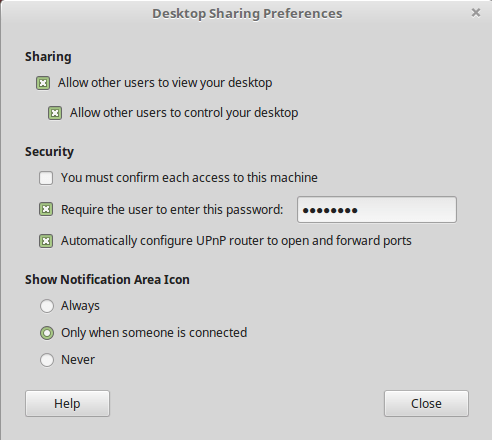
Under Sharing, go ahead and check the Allow other users to view your desktop and Allow other users to control your desktop boxes. Under Security, it’s probably a good idea to uncheck the You must confirm each access to this machine as that would require you to locally confirm the remote connection before it is accepted. If you’re giving someone else access to your machine, then it’s probably worth checking so that you can control when someone connects to your machine. In order to prevent anyone from connecting to your machine, check the Require the user to enter this password box and type in a decently strong password. Click Close as we are done with this dialog.
Install dconf Editor
Next, we have to disable the encryption that is currently required by Vino, which is the package installed in Linux Mint by default. We have to install the dconf Editor, so that we can change the default settings. Open Terminal and type in the following command: Once the package has been installed, click on the Linux Mint menu, then All Applications and scroll down till you see dconf Editor.
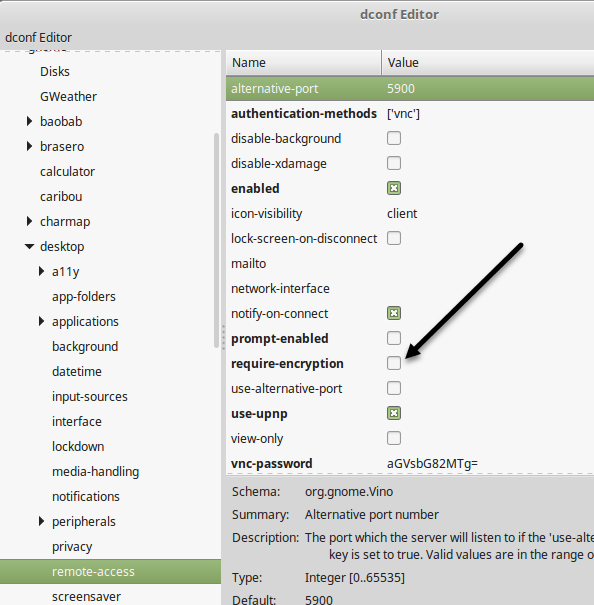
Open the editor and then navigate to org – gnome – desktop – remote-access.
In the right-hand pane, go ahead and uncheck the require-encryption box. Close the editor and then restart your Linux box. Once you are logged back in, we can try to connect.
Connect Using VNC Client
At this point, you can download your favorite VNC client for Windows and connect to the Linux box. In my case, I used the VNC Viewer program from RealVNC. You don’t have to sign up or pay for anything to use the viewer.
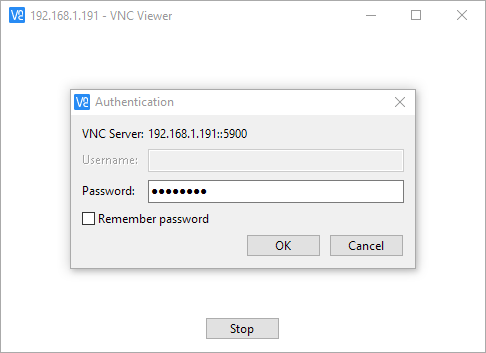
Type in the IP address for your Linux box and press Enter. Since there is no encryption, you’ll get a popup dialog telling you that your connection is not secure. Once you get past that message, you’ll have to enter the password you typed when we first setup desktop sharing settings on Linux Mint.
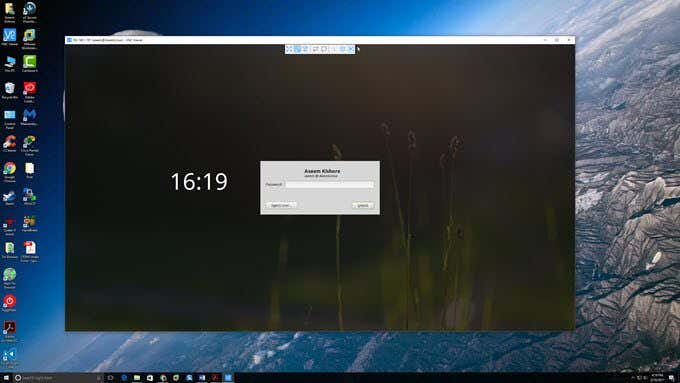
Hopefully, if all went well, you should now see the desktop for your Linux Mint machine.
As previously mentioned, this is a quick fix way to get into your Linux machine, but it is not secure. This means that all the data sent over the network is completely unencrypted, including passwords, etc. So, make sure no one can snoop on you if you plan to use this method. I’ll be posting another article soon on how to connect remotely to your Linux Mint box using encryption. If you have any questions, post a comment. Enjoy!
