Internet requests from browsers can’t read domain names. They instead only understand numeric IP addresses registered to those domains. A Domain Name Server, or DNS, is where browsers go to get the correct IP address associated with a domain. The DNS configuration settings of your website are what allows visitors to still access your site even after you move the site to a new hosting provider.
What Are Website DNS Configuration Settings & How To Set Them Up
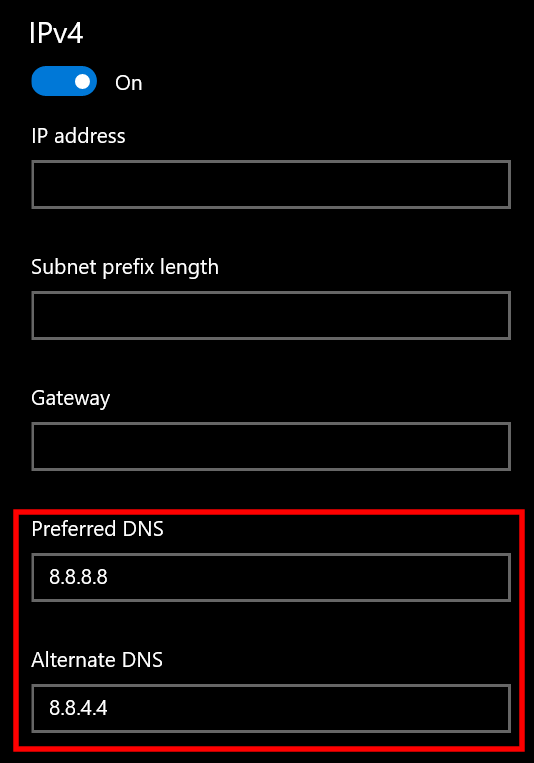
For most people, domain names are a lot easier to remember than a sequence of numbers. For the servers and computers on the internet, the opposite is true. A DNS server handles the translation so that both parties are happy. Your home network will typically rely on an ISP-supplied DNS server for your own internet router’s IP address . You can actually modify your router’s IP settings to swap your DNS servers from automatic (defined by your ISP) to something public like Google’s DNS 8.8.8.8 and 8.8.4.4. A website’s DNS settings are a bit different than this. Website DNS configuration settings are important for website owners. Anytime you choose to change web hosts, you’re changing the physical server the site is on. This also means that you’re changing IP addresses. Modifying up your DNS configuration settings to always point people looking for your domain name to the correct IP address will keep the website up and running even while swapping to new hosting. The thing most website owners need to understand is that if DNS settings are entered incorrectly, the entire website can be brought down for a lengthy period of time. Keep in mind that DNS changes are not instant, so if you make a mistake, it’s likely that no one will have access to the site until your correction is replicated across all DNS servers on the internet. Even after fixing the mistake, it could take up to 72 hours for the correction to take effect.
Preventing DNS Configuration Mistakes
To prevent mistakes from happening in the first place, ensure that you have a fundamental understanding of what A, CNAME, NS, TXT, and MX records do.
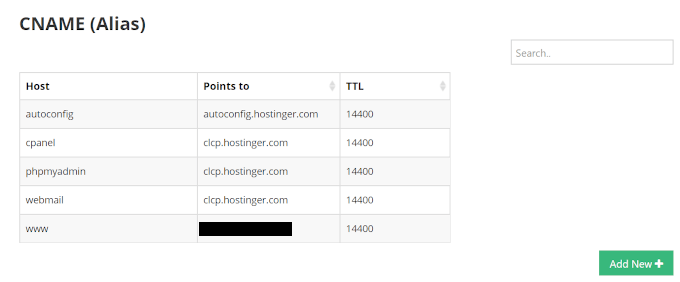
A – The A record is also known as the IPv4 address record. It’s used to point the domain name at one or multiple IP addresses. If you happen to be using a managed hosting provider like WordPress.com and also use their nameservers, you won’t have a need for an A record.CNAME – This is the Canonical Name (CNAME) record. If you already have an A record, you will not use a CNAME. The CNAME record tells anyone visiting a subdomain to also use the same DNS records as another domain or subdomain.
This sort of thing is convenient when running multiple services from a single IP address. CNAME records only work for subdomains and must always point to another domain or subdomain and never directly to an IP address.
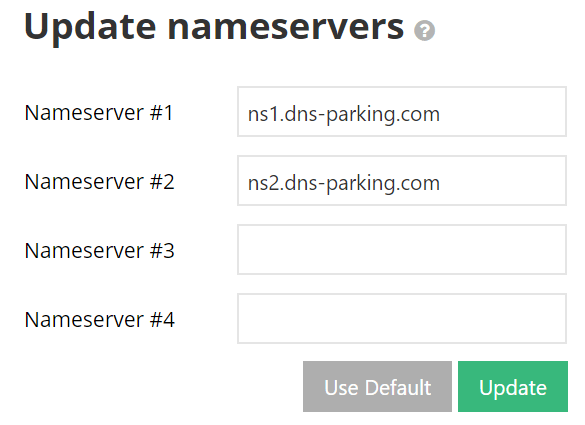
NS – These records are the nameservers. Without these, your website won’t work at all. You’ll normally have at least two of these records in your DNS configuration settings. If you’ve never changed yours, they likely look very generic, like ns1.name.com and ns2.name.com.
The NS records are stored by the Top Level Domain (TLD) server, for which there are over 1000. These are your .com, .gov, .net, and the other more common ones. The NS record has ultimate control of where domains are directed and redirected.
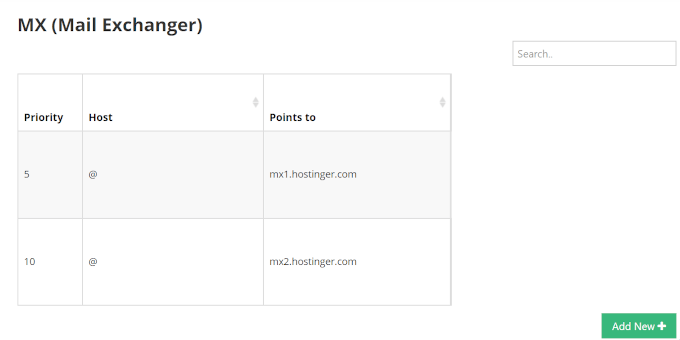
MX – These are your Mail Exchange records. They’re used to create email addresses from a domain. The MX records will direct mail servers to accept incoming mail for your domain and where received emails should be routed.
Although there are more records that you’re likely to encounter, these are the more important ones you should know.
Configuring DNS Configuration Settings
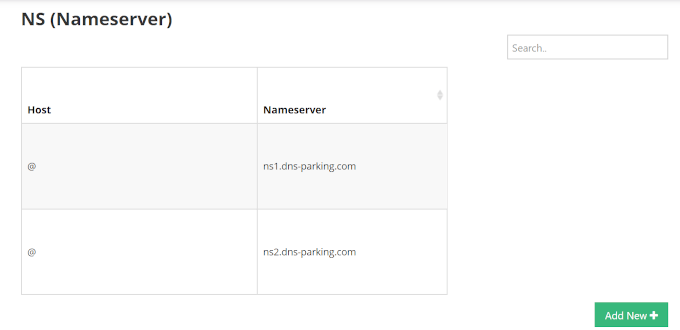
For this tutorial, we’ll be using Hostinger as our web host. Login to your account and navigate to Domains, and then the DNS Zone tab. It’s here you’ll find all of your DNS records. To modify any one of these records, click the Add New + button located at the bottom right of any of them. It’s really that simple. To further understand what you’re looking at and how to modify them, let’s use the A record. The @ in your A record is your domain name, and Points to is the IP address. By changing this, you’ll redirect all traffic headed to your domain name to the IP address you input. When moving to a new website management host, such as from WordPress to SquareSpace, you’d have to alter the Points to of the @ record using the IP address provided by SquareSpace. When entering a hostname, it can be done in one of two ways: Full hostname followed by a period – full.hostname.com or the full subdomain. Let’s say that you want to redirect your WordPress domain to point to a Hostinger domain server. There are two ways you could go about doing this. The first and easiest way is through changing the nameservers at your domain name registrar. The reason this method is recommended is that your DNS zone will automatically configure to match the hosting’s IP address. This way will also allow you to transfer control of your domain settings to the Hostinger hPanel.
You’ll need to locate the nameservers in the DNS Zone which is in the NS section.
Next, log in to your domain registrar’s control panel. If you’re unfamiliar or have forgotten the name of the company, you can use whois lookup.In their version of the DNS Zone, delete all values from the nameserver fields and input Hostinger’s nameservers.Then Save changes.
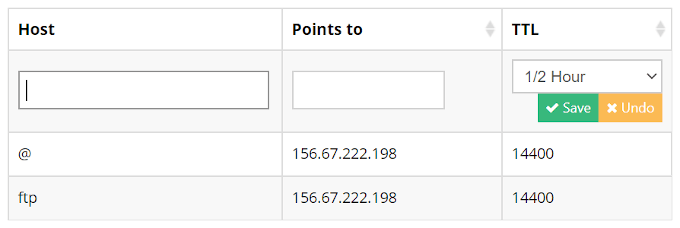
This method could take up to 24 hours for the DNS to fully propagate. The second way is more technical as you’ll need to point the domain name via A record. You’ll need to change the IP address connected to the DNS records. This will keep your domain control in the registrar. If you know for certain that the IP address is going to remain static, this process isn’t necessary. Modify the A record IP addresses and point your domain name to Hostinger. In most cases, this will require two A records for the domain – one with a www subdomain and one without. An example would be if you had a domain named ilovecoffee.com and you wanted to point it to 212.1.212.65 as its IP address, you’d need to create A record entries that look like this: It may look different to that of your registrar. Just fill in the similar values as shown in the image. The fields will be as follows – Name/Host, TTL, and Points to/Record. The average Time To Live (TTL) value is 86400 seconds, which is 24 hours. When it comes to what you should set it as, look at other record entries. In this case, our DNS settings show 14400, which is 4 hours. 4 hours doesn’t exist in the Hostinger dropdown menu, so it’s advised to go with the average. Once this step has been completed, you can move on to changing the MX record for email. Of course, this step is only required if you currently use the email server offered by your host. This process is simple. The only different field here from the A record is Priority. This field determines the priority of each server you have. The lowest number represents the highest priority. If you only have the one server, it’s best to place a number between 0 and 5 into the priority field. For additional help and guidance on DNS configuration settings, contact your web host. Many things, including accessing the DNS configurations, can be different depending on the host provider. Refrain from making major changes without receiving assistance. Once you get the hang of things, making changes to your DNS configuration settings can be a simple and painless process.
