Regardless of the reason, the ability to schedule sending your email at a set time is a valuable tool. In this article you’ll learn how to schedule an email to go out at a set time on Gmail, Yahoo, and Outlook. You’ll learn how to do it both online and on the desktop and mobile clients.
Schedule an Email In Gmail
In 2019, Google finally added the email scheduling feature in Gmail in both web and mobile clients. Using the schedule send feature couldn’t be easier.
Scheduling Emails In The Gmail Web Client
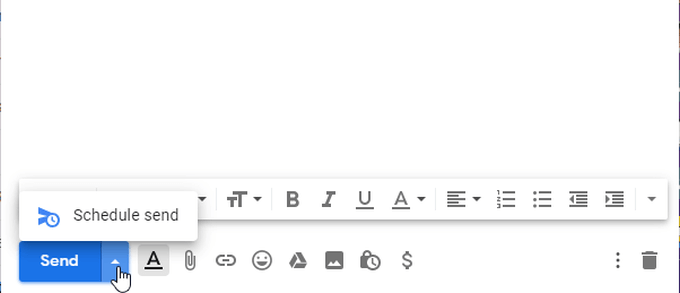
When you’re in the email compose window, just select the down arrow next to the Send button. You’ll see the option to select Schedule Send.
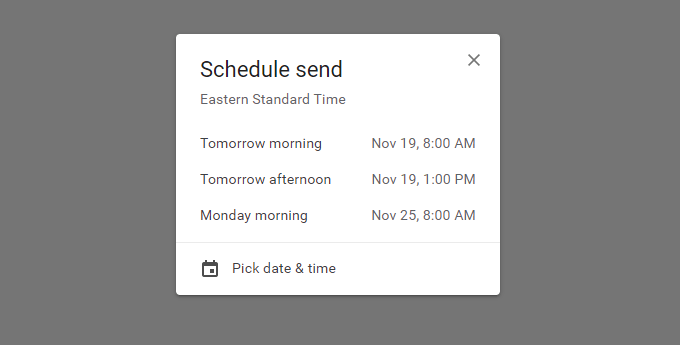
When you select this, you’ll see three common preset dates to choose from, or you can select Pick date & time to create your own custom send date and time.
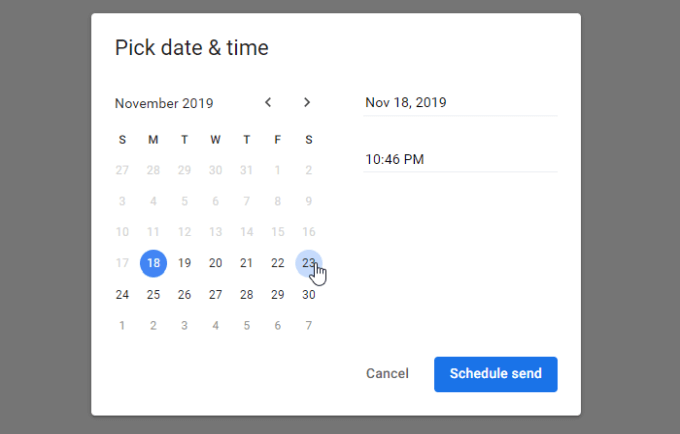
If none of these work for you, select Pick date & time, and you can set your own date and time using the calendar widget. Select Schedule send when you’re done.
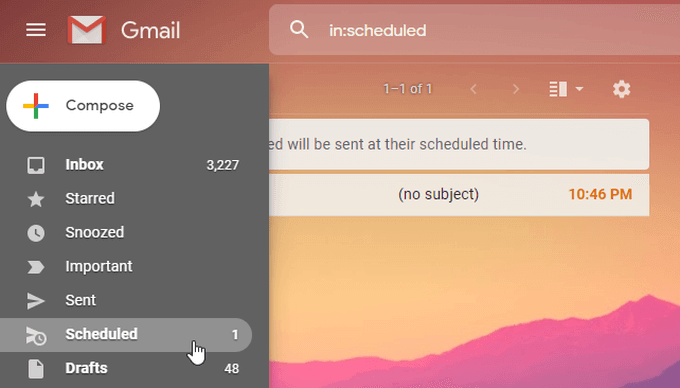
You can see all of the emails you’ve scheduled by selecting Scheduled from the left navigation menu.
Scheduling Emails In The Gmail Mobile Client
This works essentially the same way in the Gmail mobile client.
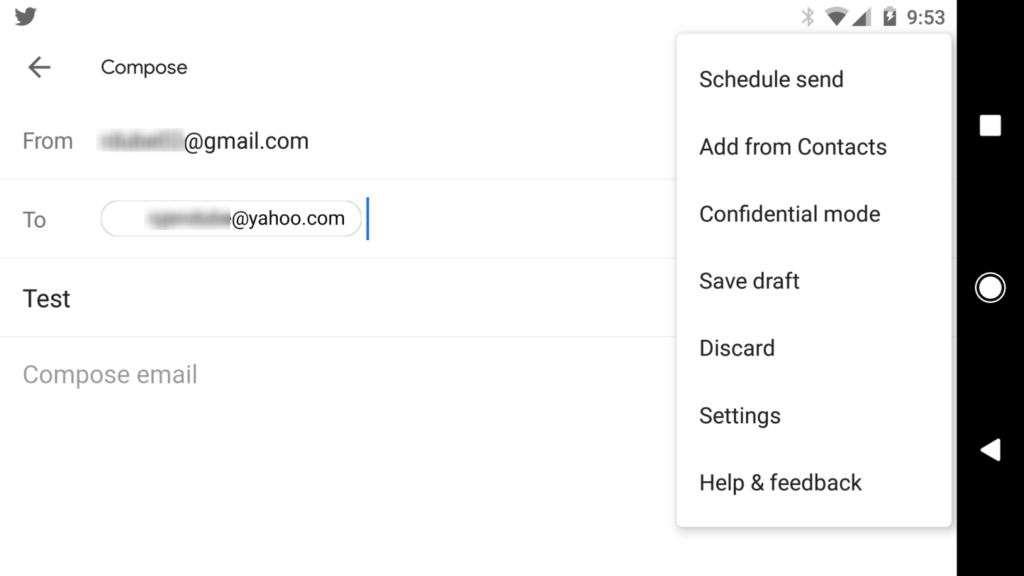
When you compose an email in the Gmail mobile client, just tap the three dots next to the send icon. You’ll see an option to Schedule send.
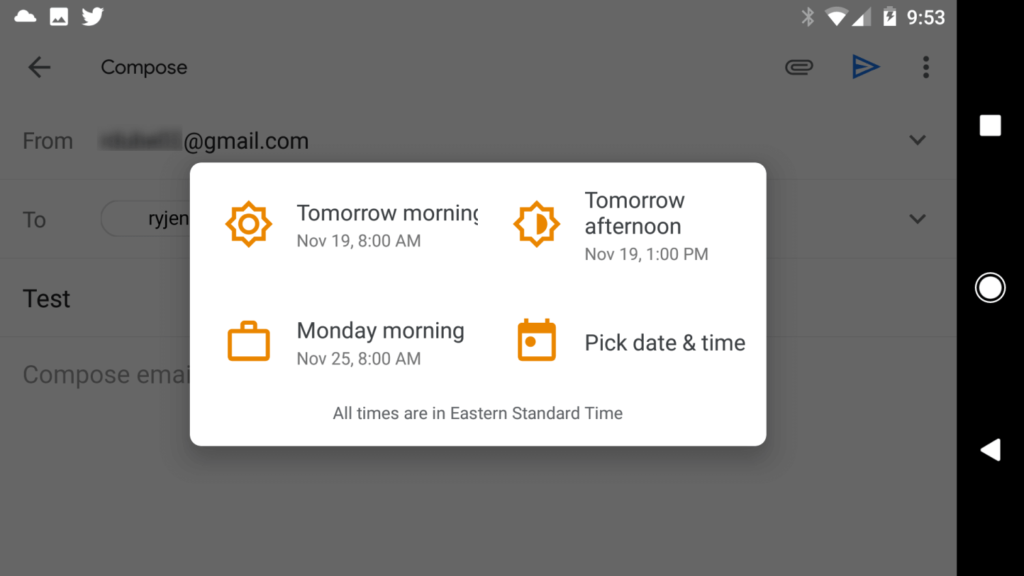
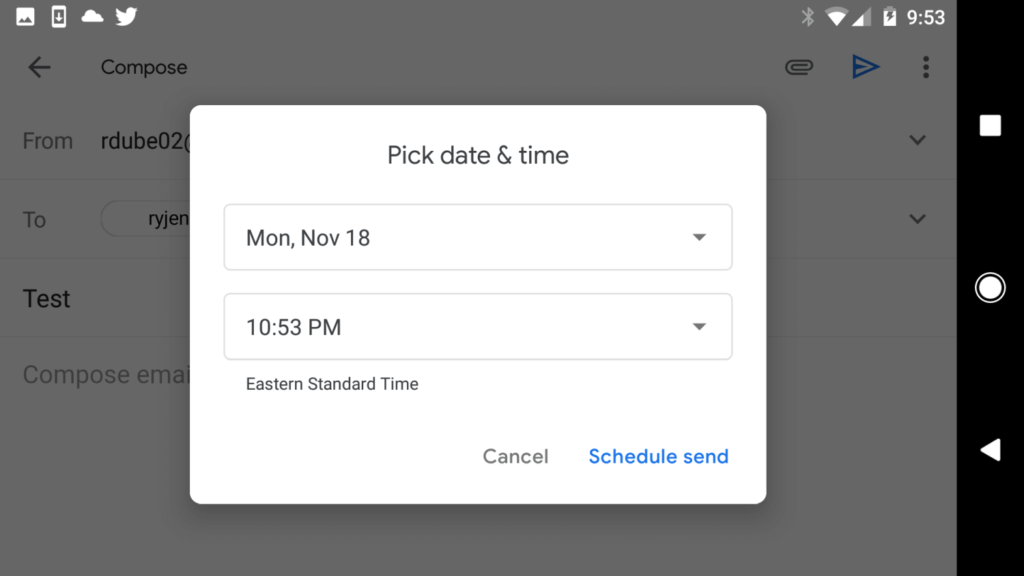
When you tap this, you’ll see the same preset schedule options, or you can select Pick date & time to customize the send date and time.
Set the date and time and then select Schedule send to finish.
Schedule an Email In Yahoo
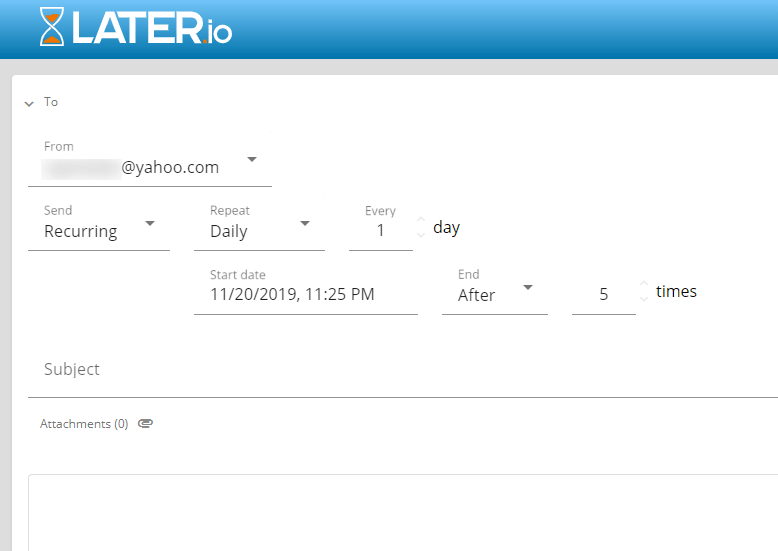
Unlike Gmail, Yahoo doesn’t have a schedule send feature. This means that you’ll need to find a third-party service that’ll help you schedule emails through Yahoo. The Boomerang browser plugin used to be the go-to option for scheduling emails in Yahoo, but Boomerang for Yahoo has been discontinued. Thankfully, there’s another service you can use called Later.io. There’s a free account where you can send up to 10 emails a month. If you need to schedule more than that, you’ll need to choose from one of the affordable plans. When you register for Later.io, make sure you sign up with the email address you want to send from. You’ll need to click a link in a verification email to finish.
Inside the Emails dashboard, select Compose to create a new scheduled email.
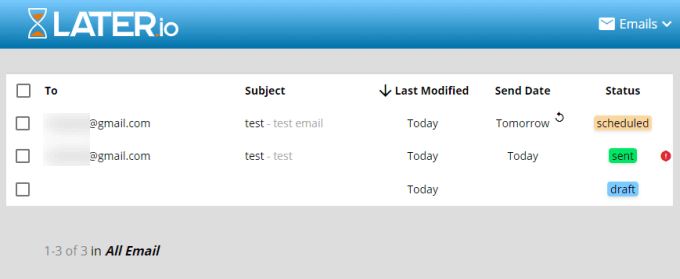
Once you select Commit, you’ll see the email show up in your list of schedule emails.
It’s unfortunate that you have to schedule an email from a service outside of Yahoo Mail, but this is the only way to get around Yahoo’s lack of an email scheduling feature.
Schedule an Email In Outlook
Boomerang still offers a schedule email send service for Outlook users. It works with Outlook.com.
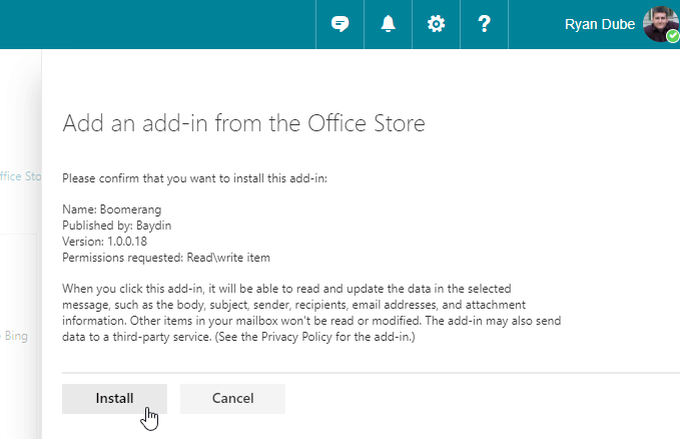
When you first sign up for Boomerang for Outlook, you’ll need to sign into your Microsoft account and authorize the service’s access to your account.When finished, log into your Outlook.com account, and select Manage add-ins under General in the left navigation pane. Select Install to finish.
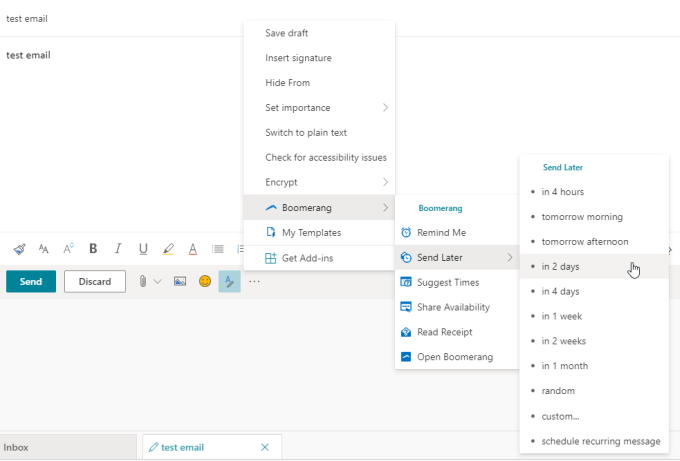
In Outlook.com, when you’re composing an email, select the three dots to the right of the Send button. In this menu, you’ll see Boomerang in the list. Select it and you’ll see a list of options.
Remind Me: Receive a reminder if you don’t receive a response to the email in a set amount of time.Suggest Times: Embed suggested meeting times into the email.Share Availability: Let the recipient know when you’re available to meet.Read Receipt: Get an email when the recipient opens your email.Send Later: Schedule your email.
The Send Later option lets you schedule a delay. You can choose from a variety of preset delays, or customize a date just like in the Gmail solution above.
Once you make a selection, you’ll see a status flash at the top of the email with the date that the email will be sent.
Schedule an Email In Outlook Desktop
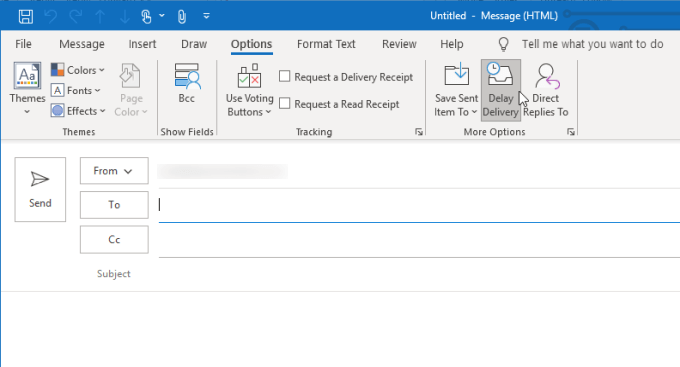
Outlook desktop has a scheduled send feature called Delay Delivery.
You can access it by composing a new message. Select Options from the menu, and selecting Delay Delivery in the More Options section of the ribbon.
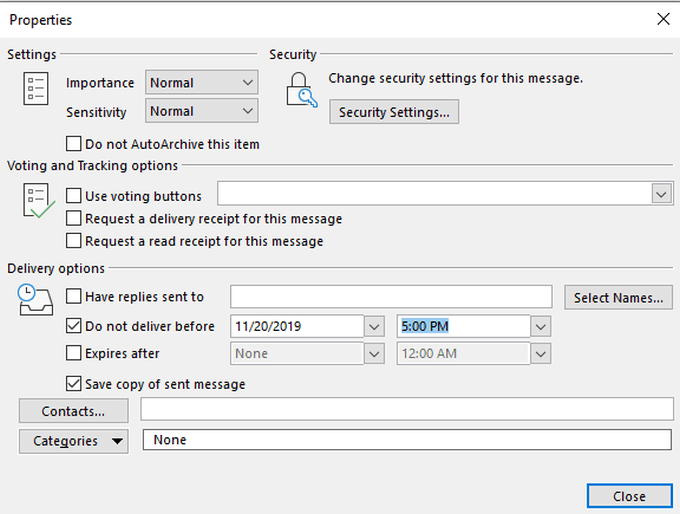
Once you select Delay Delivery, it’ll open a new window. Under Delivery options, you can select Do not deliver before and enter the date and time when you’d like the email to be delivered.
Select Close to finish. Once you select Send, the message will only be delivered at the date and time that you’ve selected.
Schedule Emails Using Google Sheets
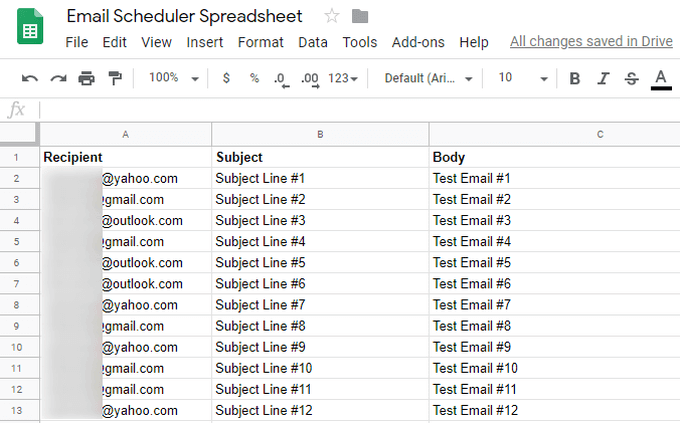
If you find yourself sending batches of emails each month to different people, like managers or colleagues, with reports or other information, Google Sheets is a perfect solution. You can easily set up a Google spreadsheet that contains recipients, subject lines, and the bodies of the bulk set of emails you want to send.
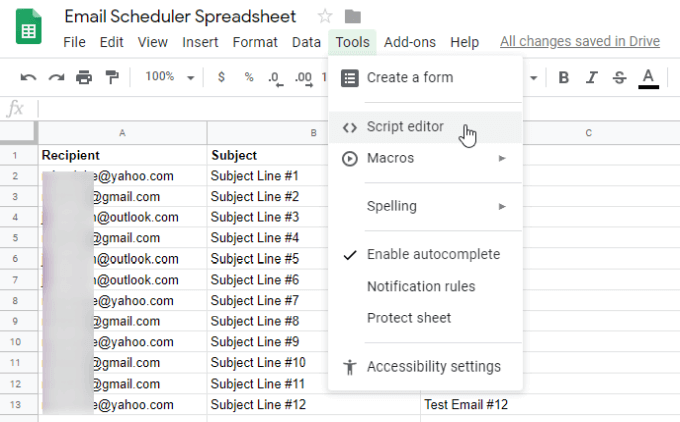
Create the email scheduling script by selecting Tools from the menu, and selecting Script editor.
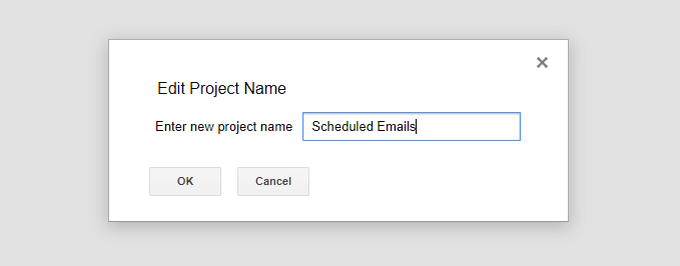
To begin creating your script, you’ll need to give your project a name. Select the project name and fill in the field.
In the editor, paste the following script:
function sendEmails() { var sheet = SpreadsheetApp.getActiveSheet(); //var startRow = 1; // First row of data to process var dataRange = sheet.getDataRange(); var last_row = dataRange.getLastRow(); // Fetch values for each row in the Range. var data = dataRange.getValues(); for (var i=1; i < last_row; i++) { var row = data[i]; var emailAddress = row[0]; var subject = row[1]; var message = row[2]; MailApp.sendEmail(emailAddress, subject, message);}dataRange.clearContent();}
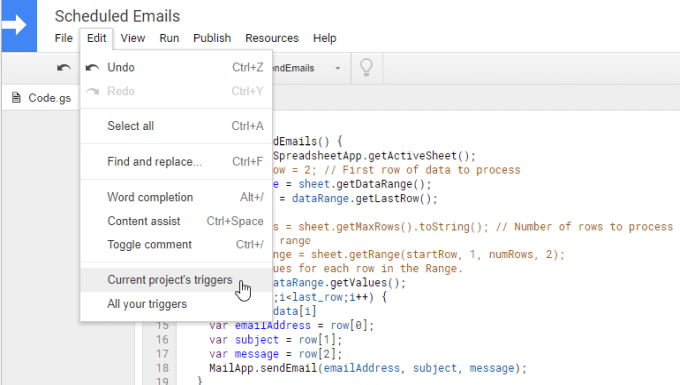
This script will access your spreadsheet and pull the last row with data. It then gets all values from the range with data, and loops through every row. Each loop will pull the email address, subject line and message, and send the email to the address for that line.When it’s done sending all of the emails, it’ll clear the sheet. Now the sheet is ready to send your next batch of emails.Schedule this script to run every month. Select Edit from the menu and select Current project’s triggers.
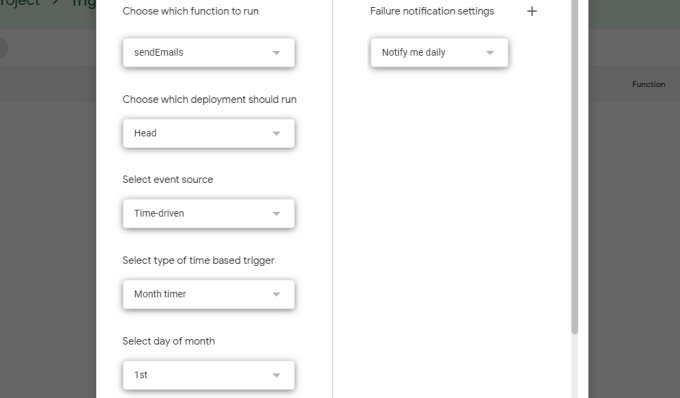
On the triggers page, select the Add Trigger button. In the Trigger Page, change the Event Source to Time-driven. Set Select type of time based trigger to Month timer. For Select day of month, select the day of the month when you want to send your emails.
When you’re done, select Save to finish. Now your script will run every month.
All you have to do throughout the month is fill out your list of emails that you’d like to have sent out on the date that you’ve scheduled. This is one of the easiest ways to send out batch emails, thanks to Google’s script triggering feature.
