If port forwarding isn’t enabled, the traffic for these servers will get stuck at your router and it won’t ever reach the desired device on your local network. With all the port forwarding tutorials available out there, it’s easy to set it up on your router no matter what router you have got. While doing so, you’ll want to make sure that you set up port forwarding in such a way that it only allows certain IP addresses to access those ports. You don’t want just anyone on the Internet to be able to access your open ports.
Assign a Static IP Address To Your Device
Before you go ahead and enable port forwarding on your router, you’ll need to assign a static IP to your machine. It’s because when you forward a port, you need to specify the IP address of the device where the traffic should be routed to. This should be the device you want to receive traffic on.
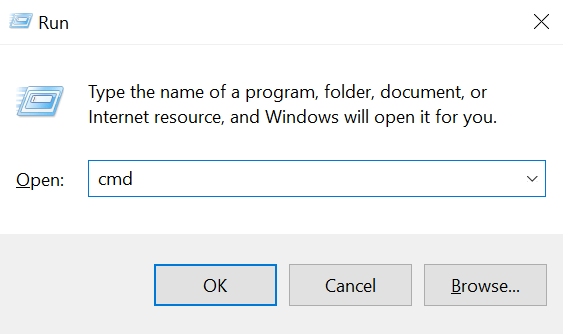
On your Windows computer, press the Windows + R keys at the same time, type cmd, and hit Enter.
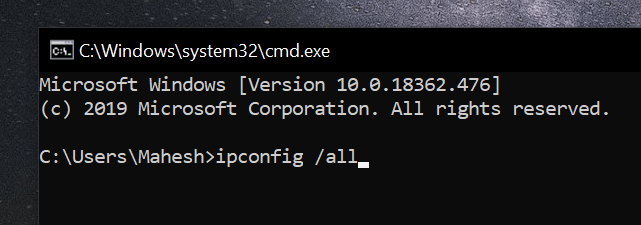
When the Command Prompt window launches, type in the following command and press Enter. It’ll show your network status.ipconfig /all
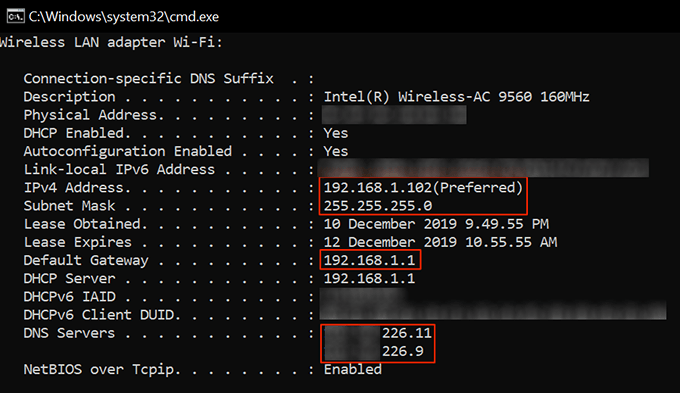
You should see your network details in the window open on your screen. You want to note down the following things as you’ll be needing these in the later steps in this guide. Then close the window.1) IP address2) Subnet mask3) Default gateway4) Preferred DNS server5) Alternate DNS server
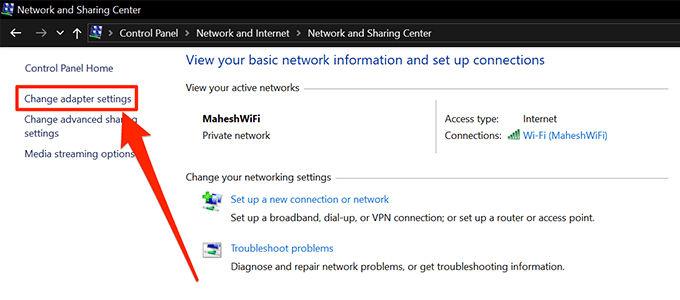
Use the Cortana search box to search for and open Control Panel. Click on View network status and tasks on the main interface.
Find and click on the option that says Change adapter settings in the left sidebar.
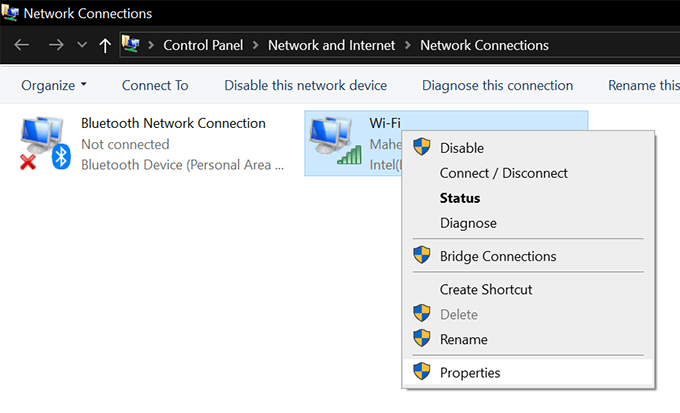
If you have multiple network adapters, you’ll see all of those on this screen. You want to right-click on the one that you use to connect to the Internet and select Properties.
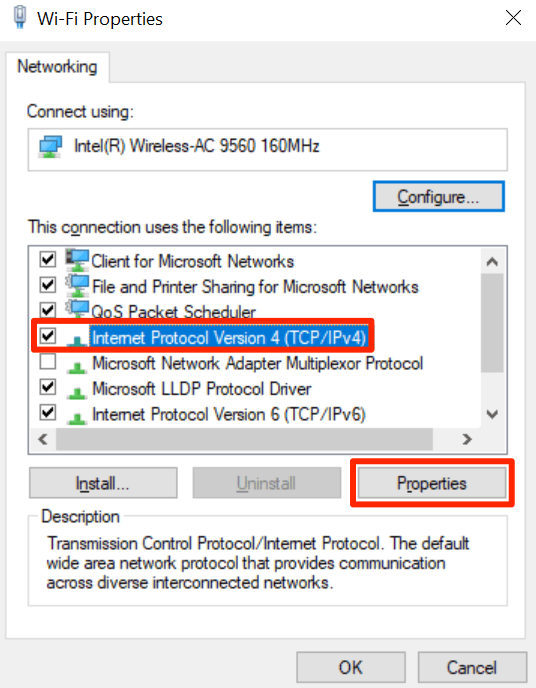
On the following screen, select the option that says Internet Protocol Version 4 (TCP/IPv4) and then click on the Properties button.
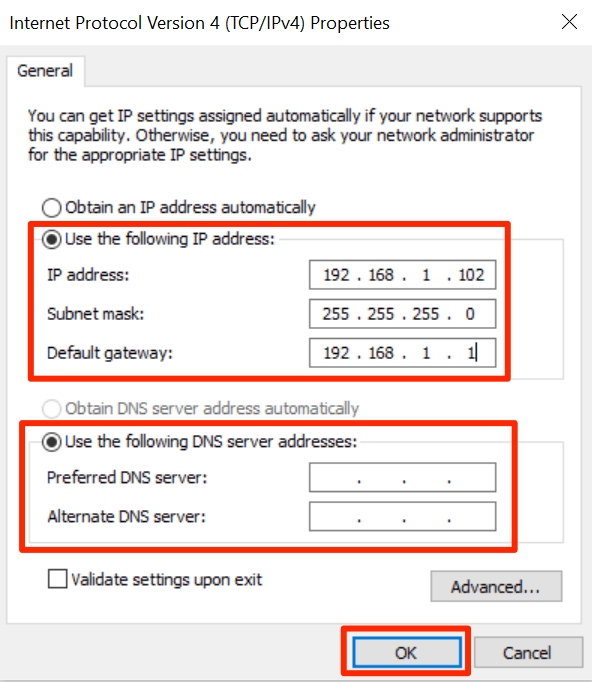
The following screen lets you assign a static IP address to your computer. Enable the option that says Use the following IP address and it’ll let enter your values in the input fields.Fill in the fields with the values you noted down earlier from the Command Prompt window in this guide.Click OK to save the changes.
While assigning an IP address to your computer, you want to make sure it’s a bit far away from your current IP address range. It’s because if you reboot your machines, your router may assign your chosen IP address to another device on your network which will cause an IP conflict on your system. To be on the safe side, if your current IP address is 192.168.1.105, assign something like 192.168.1.140 to your computer. This’ll prevent IP conflict.
How to Port Forward On Your Router
Now that your computer has a static IP assigned to it, you can go ahead and forward the ports using our how to port forward steps below. The steps will slightly vary depending on the router you use. However, you should be able to find the options you need as they’ll have similar names.
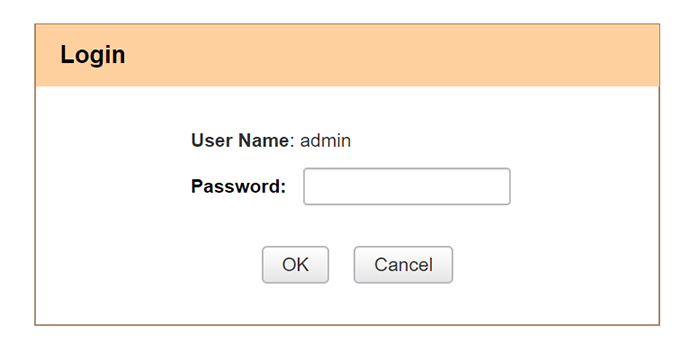
Access your router’s settings page which is usually located at 192.168.1.1.Log into your router using the default logins, if you haven’t changed them. This should be admin and admin for both fields.
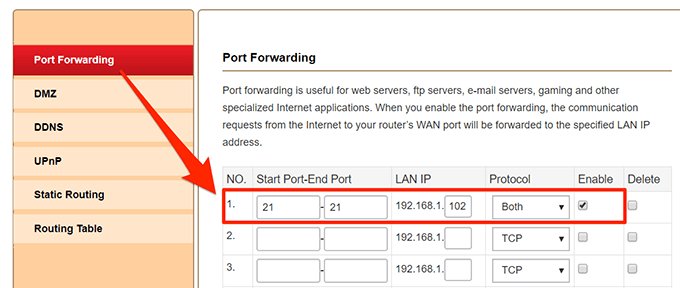
Click on Forwarding at the top to open the forwarding settings screen.
Click on Port Forwarding in the left sidebar and you’ll be able to port forward. Enter the following details in the given fields on your screen.Start Port – enter the starting of the ports you want to forwardEnd Port – the end of the range of your portsLAN IP – enter the static IP address of your computerProtocol – you can choose according to your requirements. If you aren’t sure, select Both.Enable – tick-mark the boxFinally, click on OK at the bottom to save the changes.
Your chosen ports have now been forwarded to your specified IP address. Any traffic that is sent to those ports on your network will be routed directly to your LAN IP which is your computer. The apps or software that asked you to port forward should now work without any issues.
Restrict IP Addresses From Using The Open Port
The ports you’ve forwarded can actually be accessed by anyone on the Internet. You want to restrict the access so only certain allowed IP addresses can use those ports.
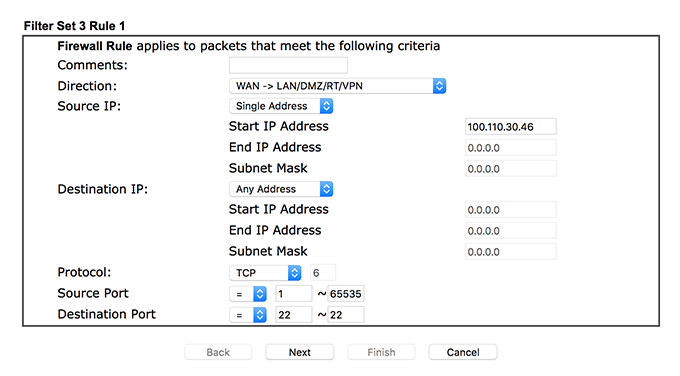
Open your router’s settings, select Firewall, and choose Filter Setup.Enable the default data setup and set the options as the following:Direction – WAN -> LAN/DMZ/RT/VPNSource IP – select Single Address or Range Address.Start IP Address – enter the IP that can access your portsEnd IP Address – enter the ending IP in the range that can access your portsDestination Port – enter the port you forwarded
Then click on Next.
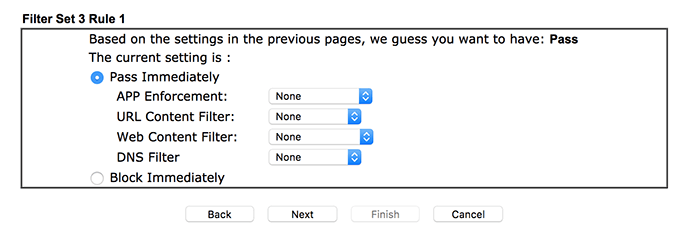
Choose Pass Immediately and click on Next and Finish.
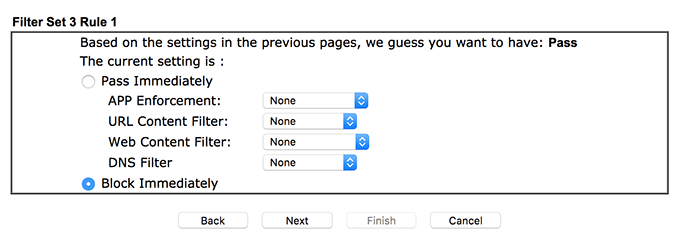
Create a new filter rule and enter your port in the Destination Port box. Click on Next and choose Block Immediately.
Make sure the rules are in order as you created them in the above steps. The first rule will verify the IP address and only let it pass if it’s one of the IPs you have allowed. If the IP doesn’t match, the next rule will apply which blocks all the traffic to your specified port.
