So if you just noticed a completely stuck download queue in Steam and can’t figure out why, then working your way through the suggestions and solutions below should help fix that.
Pause & Resume Steam Download
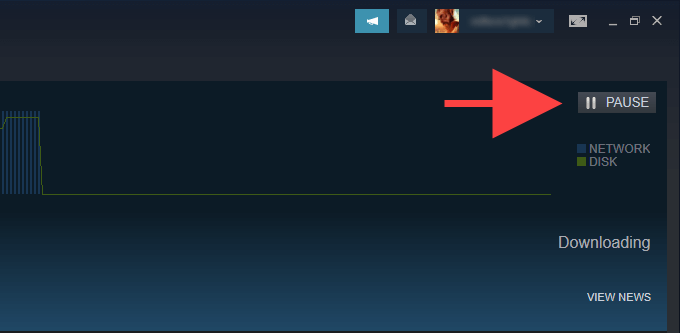
Pausing and resuming a stuck Steam download might be all it takes to get it moving again. To do that, open Steam’s View menu and select Downloads. Follow that by selecting Pause. Then, wait for a few seconds and select Resume.
Check Steam’s Disk Usage
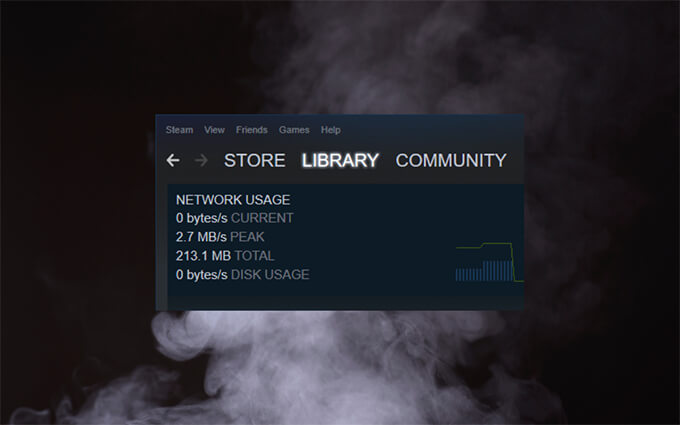
If you’re updating a video game, Steam might be making changes to the local files in the background before downloading the next batch of updated data. This can lead to the behavior where Steam downloads stay stuck at 0 bytes. Open the Downloads page in Steam again and check the speed next to Disk Usage. If it denotes activity (as in, it’s also not stuck at 0 bytes), then that’s likely the case. If it’s a sizable update for a moderately large game, it’s best to wait it out for at least an hour before moving on to the next fix.
Update the Steam Client
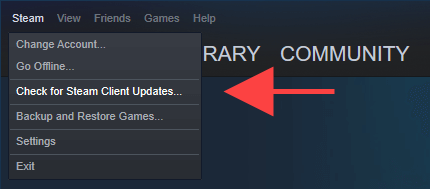
A buggy Steam app can also cause issues. The best way to rule that out is to check for and apply any pending client-side updates. To do that, open the Steam menu and select Check for Steam Client Updates.
Restart the Steam Client
Restarting the Steam client is another quick fix that can help. To do that, pause any downloads and select File > Exit. You might also want to open the Task Manager in Windows and force-quit any stuck Steam processes. Then, re-open Steam and resume the download queue.
Run Steam as Administrator
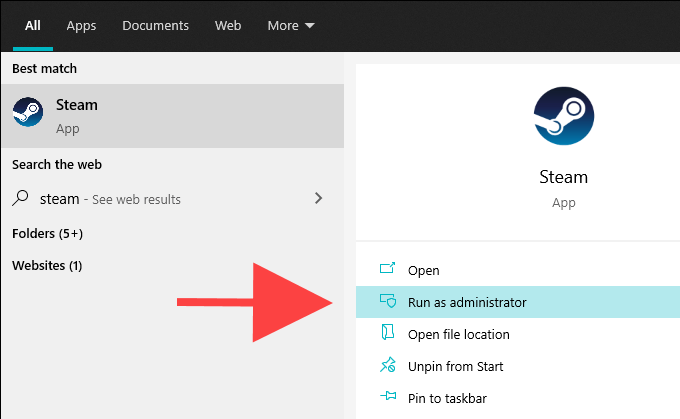
Running Steam as an administrator is a powerful way to resolve issues that stem from insufficient permissions. Start by completely exiting Steam. Then, search for Steam on the Start menu and select Run as Administrator. If that helps, learn how to set up Steam to run as an administrator always.
Verify Integrity of Local Files
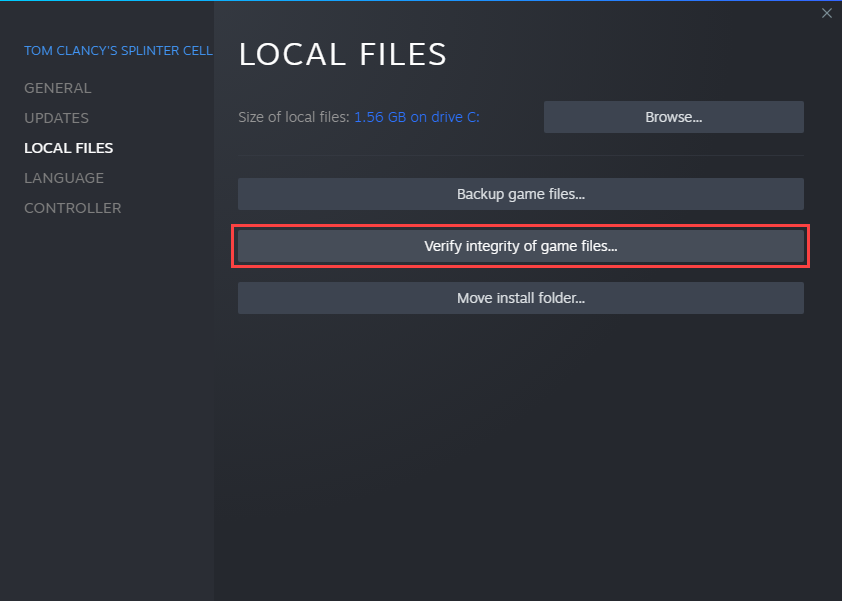
Video game updates may also stall due to corrupt or incorrectly modified local files. If you keep seeing Steam’s download speed stuck at 0 bytes, try verifying the integrity of the game installation related to the problem. To do that, switch to the Library tab on the Steam client. Then, right-click the game and select Properties. Follow by selecting Local Files > Verify integrity of game files.
Check Your Internet Connection
Try using a speed checking service such as SpeedTest.net or Fast.com to ensure that nothing’s wrong with your internet connection. If you notice unusually low speeds, try these fixes:
Soft-reset your router.Move your computer closer to the router or access point.Switch to a wired connection (if possible).Renew your computer’s IP lease.Pause any active downloads or video streams in other programs.Pause any active downloads or video streams in other devices connected to the same network.Disable any active virtual private networks (VPNs).
Change Steam’s Download Region
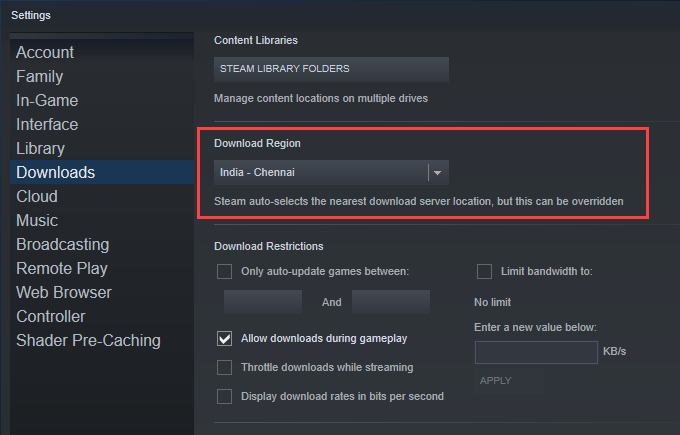
Living in a region with high Stream traffic can impede downloads or even cause them to get stuck completely. Hence, try picking a different download region. To do that, open the Steam menu and select Settings. Follow by switching to the Downloads tab. Then, use the pull-down menu under Download Region to change the default region. Ideally, it should be closer to your actual physical location, but feel free to experiment.
Modify Download Settings & Restrictions
You might also want to double-check Steam’s settings to ensure that no restrictions keep interfering with downloads and updates. Again, open the Steam menu and go to Settings > Downloads. Under the Download Restrictions section, make the following quick changes:
Uncheck the box next to Only auto-update games between.Uncheck the box next to Limit bandwidth to.Check the box next to Allow downloads during gameplay.Uncheck the box next to Throttle downloads while streaming.
Clear the Steam Download Cache
If your Steam downloads continue to remain stuck at 0 bytes, you must clear the download cache for the Steam client. That often gets rid of any obsolete files impeding download progress. Open the Steam menu and select Settings > Downloads. Then, select Clear Download Cache > OK. Steam should restart automatically, and you must sign in to it using your Steam user account credentials.
Flush the Steam Configuration
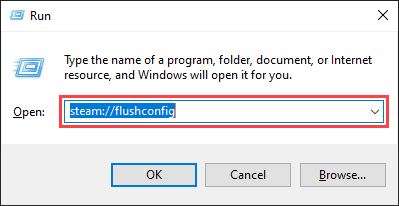
If clearing the download cache didn’t help, you might want to reset the Steam installation. You won’t lose any game-related data, so you’ve got nothing to worry about. To do that, start by exiting the Steam client. Then, press Windows + R to open the Run box and paste in the following: steam://flushconfig Select OK. Then, re-launch Steam and sign in with your Steam user account credentials.
Flush the DNS (Domain Name Service) Cache
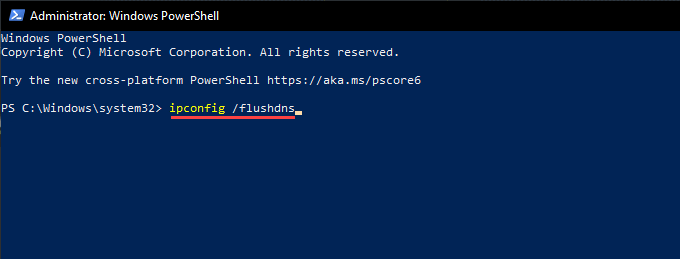
If your computer has an obsolete DNS resolver cache, that could be preventing the Steam client from connecting to any download servers. Deleting it usually helps fix that. Start by right-clicking the Start button. Then, select Windows PowerShell (Admin) and follow by running the command below: ipconfig /flushdns
Change DNS Servers for Network Connection
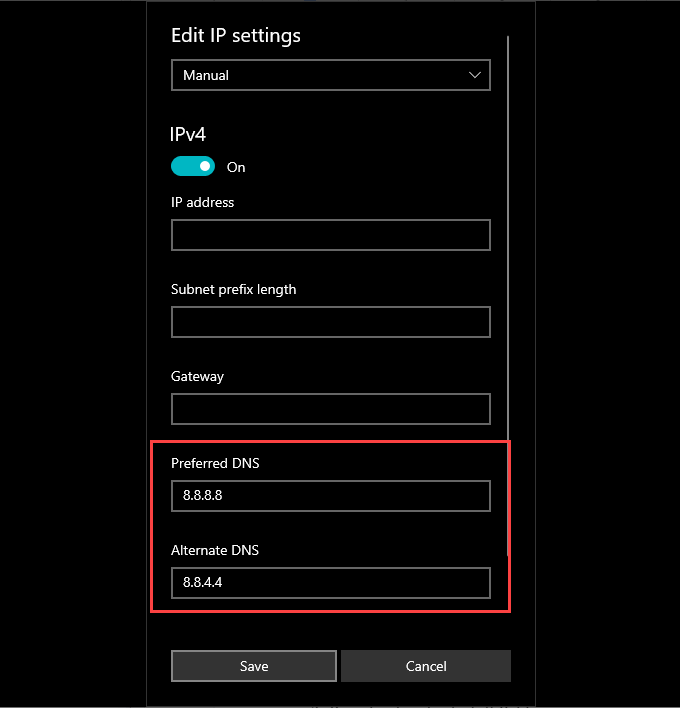
Using a popular DNS service such as Google DNS can also resolve connectivity-related issues on the PC. Start by heading over to Start > Settings > Network & Internet. Then, pick your internet connection under Wi-Fi or Ethernet and select Edit. Follow that by selecting Manual under Edit IP settings. Finally, turn on the IPv4 switch and enter the following Google DNS addresses into the Preferred DNS and Alternate DNS fields: 8.8.8.8 8.8.4.4
Disable Connected User Experiences and Telemetry
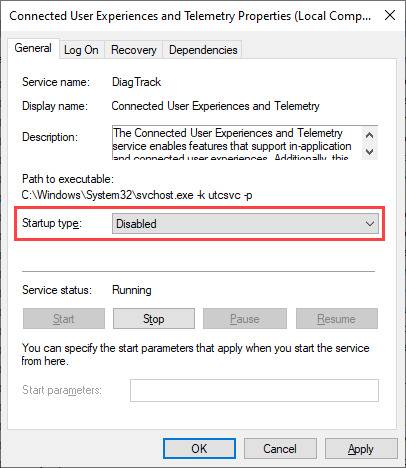
Microsoft uses a background service called Connected User Experiences and Telemetry to collect data to improve Windows 10. However, it might adversely impact Steam download speeds on your PC, so try disabling it and check if that helps. To do that, press Windows + R to open the Run box and the services.msc command. On the Services app that shows up, right-click Connected User Experiences and Telemetry and select Properties. Next, set Startup type to Disabled (under the General tab) and select Apply. Follow by restarting your computer.
Add Steam to the Windows Firewall
It’s also best to confirm that you’ve set up Steam as an exception on the Windows Firewall. To do that, open the Windows Security app and select Firewall & network protection > Allow an app through the firewall. Then, make sure to check the box next to Steam, as well as both boxes under the Private and Public columns.
If you can’t locate Steam within the Windows Firewall, select the Allow another app button and pick Steam.exe from the following folder:
C:\Program Files (x86)\Steam
Also, if you use a third-party anti-malware solution, double-check that Steam is set up as an exception by visiting its configuration pane. Or, disable your antivirus module for the duration of the Steam download or update.
Reset Network Settings in Windows
If none of the fixes above helped, you must reset the network settings in Windows. That might very well fix any corrupt network-related problems causing Steam downloads to get stuck at 0 bytes. To do that, open the Start menu and go to Settings > Network & Internet > Status > Network reset. Follow that by selecting Reset now. For more network-related troubleshooting, check out this guide to resetting the network settings in Windows 10.
